Tampilkan postingan dengan label Sally Hansen. Tampilkan semua postingan

Selasa, 19 Maret 2013

In the mood for some polish! ChG Velvet Bow


Hi Ya, Long time no mani! But today I mani-ed!!! Sorry for being AWOL!
but lotsa things going on. Missed u guys!

Base: ChG Velvet Bow
Sally Hansen: Strobe light
Revlon: Sunshine sparkle


The base is lovely dark creme polish. Smooth in 2 coats. Topped with SV.
I was going for a gradient effect with the glitter, but eh!!?
Accent is dotted with Revlon sunshine sparkle, not one of my favourites. Its tacky, streaky and takes ages to dry.


Well, here's hoping to catch you again soon!

Jumat, 01 Maret 2013

NailartFeb Challenge- Smooches

This is the Smooch! nail design I came up with. I like the idea of this updated ruffian manicure, since it adds a cooler texture to the conventional look, almost like snow. 
 
I achieved this look with using Sally Hansen's Gray by Gray as a base, the using a small piece of makeup sponge and French White Tip by NYC I crated this frosted effect, I then used a small nail art brush to draw the lips with Salsa by China Glaze


 This was probably one of my favorite manis of this challenge because I was a lot more creative with this and I think it cam out great!
smooches grilled nails grillednails art nail hector alfaro china glaze red lips sponging nailartfeb californails challenge february 2013


Moisturize within three minutes of getting out of the shower, that is when your body will soak up the most moisturizer and stay hydrated throughout the day.

     - Hector c:

Nailartfeb 2013 Challenge- Flowers

So Here is the second look, flowers! I decided to do just a dotting tool flower. I am thinking of learning the one stroke technique, but I would have to get some acrylic paints, since those are necessary for the one stroke technique!
 I started with a base of Sally Hansen's Gray by Gray, followed by a dotting of Revlon Temptress and China Glaze Flyin' High. I used a medium and small dotting tool for the flowers.
 I would rank this design as easy. The only semi-difficult part would be placing the dots within the flower the right space from each other, but other than that, you should be able to re-create this mani with ease.
grillednails grilled nails hector alfaro flowers nailartfeb february 2013 dotting tool grey pink blue


Adding a teaspoon to hard boiled eggs while boiling will make the peeling process easier!
     - Hector c:

Kamis, 28 Februari 2013

NailartFeb 2013- Hearts

I decided to do this challenge after coming across the challenge photo on Instagram. I like that this one is not a 31 day challenge, because those can be difficult to accomplish. I downloaded the wallpaper photo to show everyone which days correspond to what design and when they were. I have been crammed with tests and homework because I am taking 20 hours at school, but I am working on new designs everyday! Here is the first day of the challenge: Hearts!

nailartfeb february nail art manicure nails heart hearts dots pop art hector alfaro grillednails grilled nails
 this was the sunlight photo I took. I rarely take photos of my nails in the sunlight unless the design has a varnish that would stand out in sunlight. the purple dots were not washed out thankfully, and the design is super vibrant in the sun!
I started this design looking to mix in the pop art makeup turotials and nail tutorials on YouTube. I started with french White Tip by NYC, then Lacey Lilac by Sally Hansen for the dottes portions of the nails, Then followed with rich & Famous by China Glaze, and finished with Salsa by China Glaze for the hearts. 

grillednails nail art february hearts nails pop art manicure short nails cute
I used a medium sized dotting tool for the dots and a small nail art brush for the hearts and the purple explosion marks. 


This design is pretty easy, I decided to add the dots after the pink explosion marks because I could place them without messing with the hearts. This nail look also proves to look good on short nails too!

Thanks for visiting! Find me everywhere! I am grilled nails on every social network!


you can use a colored eyeliner to make any color mascara you want!
     - Hector c:

Kamis, 22 November 2012

Mattened Glitter Nails


Pinterest can get sooo addictive!
I had seen a mani on pinterest with matt glitter nails..but I couldnt figure out what polishes were used.
You can see the pin here and my pin board here


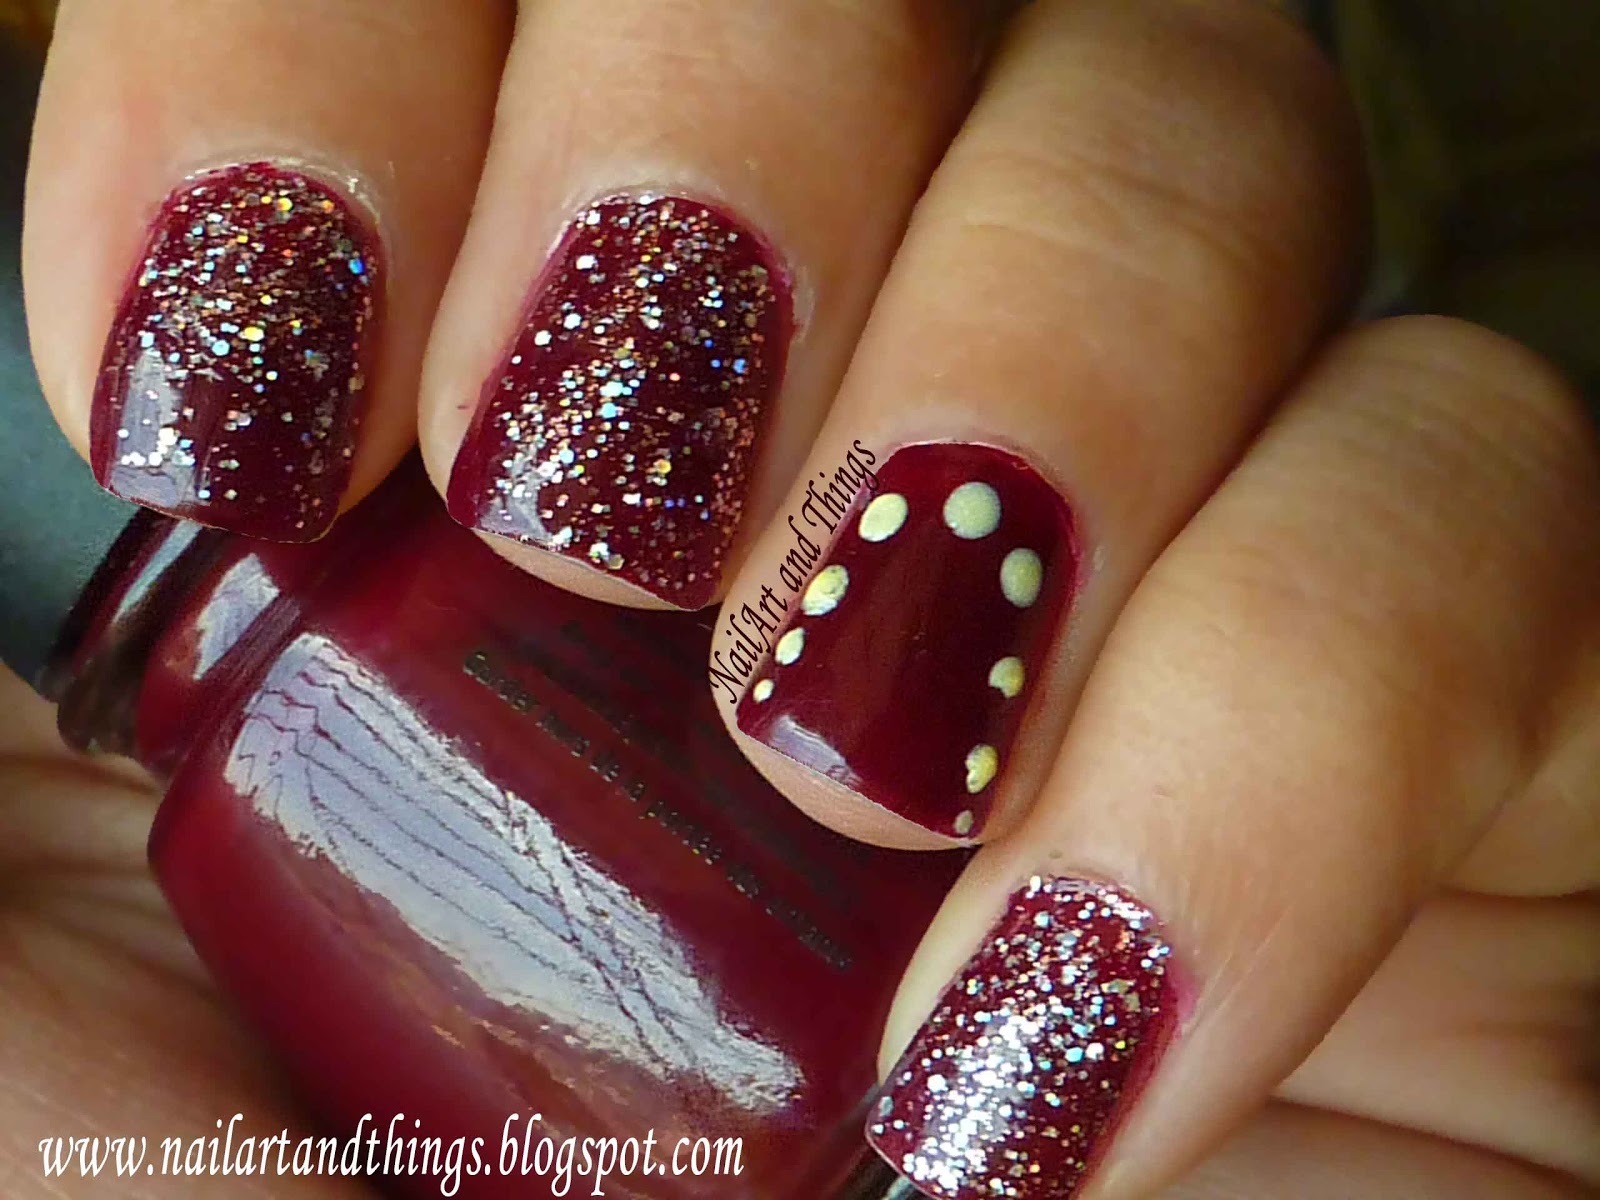
I attempted to do it with what I had. I knew I wanted duo-chromy glitter.
I painted the black base with Sally Hansen 
Made glitter gradient with Kleancolor Chunky Holo Fuschia.
KC Holo Fuschia glows from yellow-green to pink-red. I've tried to capture the glitter from both ends of the spectrum. See how it starts from yellow and is amber-red at the tips.

How to do a glitter gradient? I get this search term a lot..so here's how:
For a glitter gradient: I added a single coat of KC all over the nail. Allow a few mins to dry.
Next dabbed some KC at halfway down the nail. Again allow a few mins to dry.
Now just dab again using the glitter polish at the tips.

I added the Inglot Matt top coat after a day as I liked the glistening nails. However I like the matt version better.


It looked so much pretty in real! like twinkling lights. 
You have to matt-en some glitter to see what I mean. It looks absolutely gorgeous!! 

Have you tried to matt-en glitter?